After reading the tutorial on Vector drawing in Illustrator, you may be wondering: but where’s the fun in that! So in this tutorial, I will show you how to do pencil drawings in Photoshop, using a Wacom tablet. Although Wacom tablets can be super duper expensive, the nifty thing is it comes with a stylus that gives you the feel of drawing on paper. The advanced models of Wacom have a screen that copies your computer screen, allowing you to use any graphic software you’re used to working with. Lately, the Chicago House has been experimenting with using tablets in the field, and their weapons of choice are the portable Wacom Cintiq Companion (running on Windows 8) that does not require a laptop/pc attached to it, and the iPad Pro with Apple Pencil. Unfortunately I don’t have experience with these models, but you can read all about it in the second edition of the Digital Epigraphy manual that I will post a link to as soon as it has been officially released.
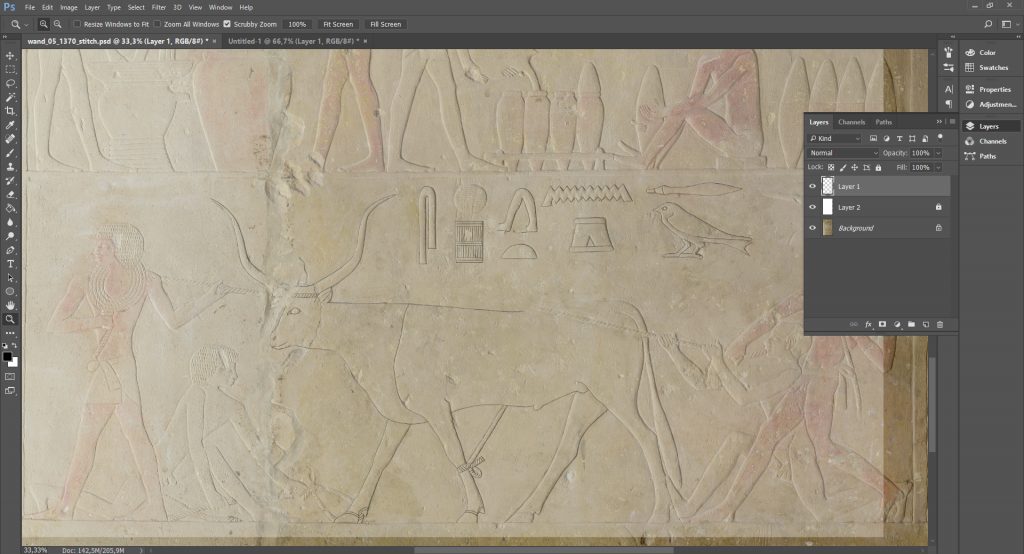
Fig. 1: Pencil drawing in Photoshop (click to enlarge)
So how to go about penciling on a photo in Photoshop? Once your Wacom tablet is set up, plugged in and calibrated, open your photo in Photoshop. Add a new layer (your Layers panel is on the right, if not, go to Window > Layers or press F7 to toggle it on). Fill it with white using the Paint Bucket Tool (G on your keyboard). Set the opacity to something like 30%, so you can still see the underlying photo but also the lines you’re going to draw on top of it. Lock both the photo layer and white layer selecting the respective layers in the Layers panel and clicking the padlock icon. Add a third layer – this is where you’ll be penciling.
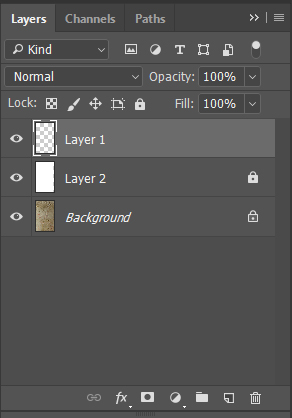
Fig. 2: Arranging your layers, locking the photo and white layer
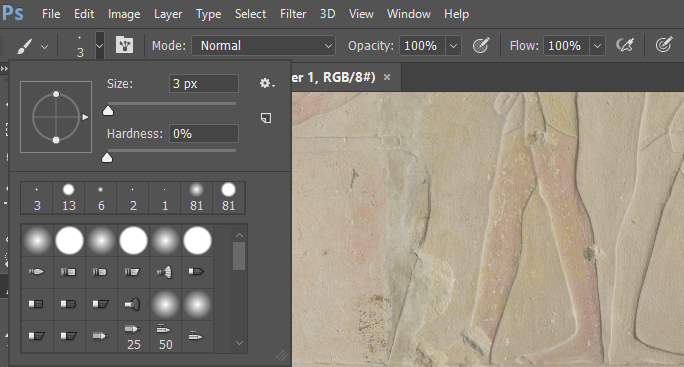
Fig. 3: Set your Brush size and hardness
Select the Brush Tool (B key) and set it to an appropriate size. Chicago House recommends 6 px, for the purpose of my drawing I found that too dark, so I chose 3 px. Set the Hardness to 0%. You can save this brush as a preset by clicking the little square icon in the lower right corner of the Brush panel that says ‘Create new brush’ when you hover over it. You can give your brush a name, such as ‘Pencil’.
Now zoom in (Zoom Tool or Z key) so you can see the details of your photo, take up your stylus and start penciling! You can apply pressure to get a darker line, just like when using a pencil on paper. (Note: If the pen pressure is not working, try clicking on the icon on the far right of the brush options shown above your canvas.) On the back of the stylus is a cap that works as an eraser. You can toggle the white layer on and off for better visibility. If it’s off, you’ll see the underlying photo better, if it’s on, your own pencil lines will be more clearly visible. If you set your stylus to the tablet and press Shift, you will be able to draw a straight line. This can be useful when drawing the most difficult of all hieroglyphs, the nasty little T loaf!
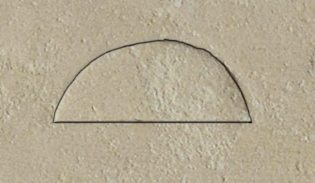
Fig. 4: After all this time I’m still unable to draw a proper loaf
When I was working at Saqqara as a student, Will Schenck kindly taught me a trick to draw the wavy lines of the N hieroglyph. First, draw all the parallel lines in one direction, then in the other. Then connect the opposing lines where they come together at an angle. Note that the outer brackets of the N glyph are taller than the middle ones, and how they diverge slightly at the bottom.
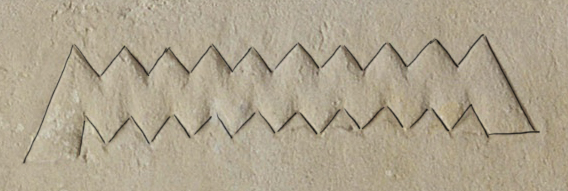
Fig. 5: Drawing the N hieroglyph
Try to draw lines in sections. Otherwise you’ll keep redoing a line and pressing Ctrl + Z (Undo). The Wacom tablet has useful buttons on the side for these shortkeys. The good thing about digital penciling is that you won’t have to be busy with cotton swabs and alcohol to remove your permanent marker lines from the perspex sheet! To go back multiple steps, press Alt + Ctrl + Z repeatedly.
Save your work often in .psd format, keeping all your layers intact. To review your work during the process, hide the photo and white layer by clicking the eye symbol in front of it in the Layers panel, and choose File > Save As to save in .jpg format.
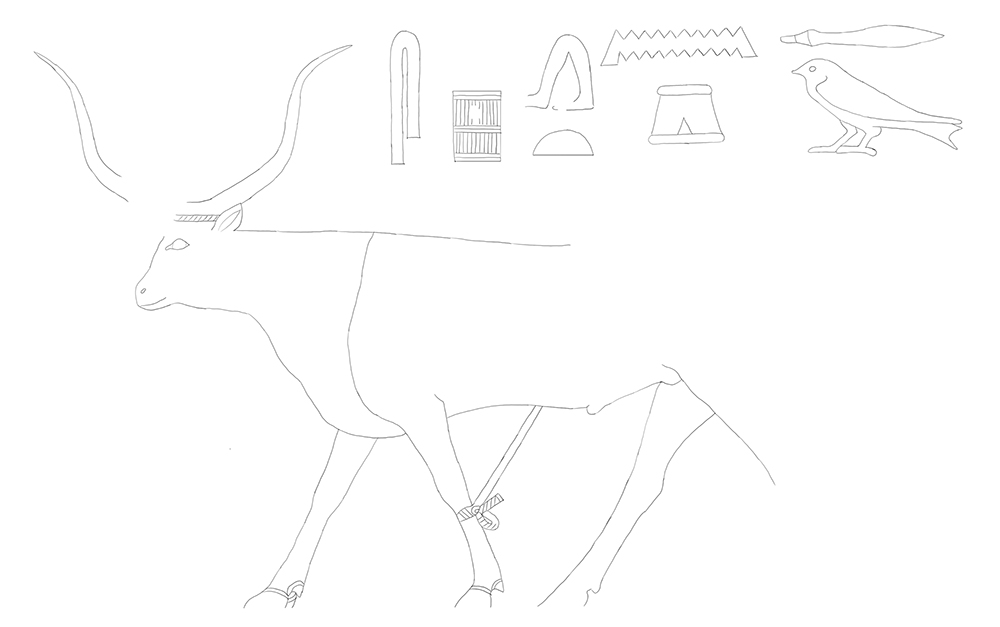
Fig. 6: A pencil drawing in progress
1 thought on “Pencil drawing in Photoshop”