Here I present a simple tutorial for the Photogrammetry workshop held during the International Congress for Young Egyptologists in August 2019.
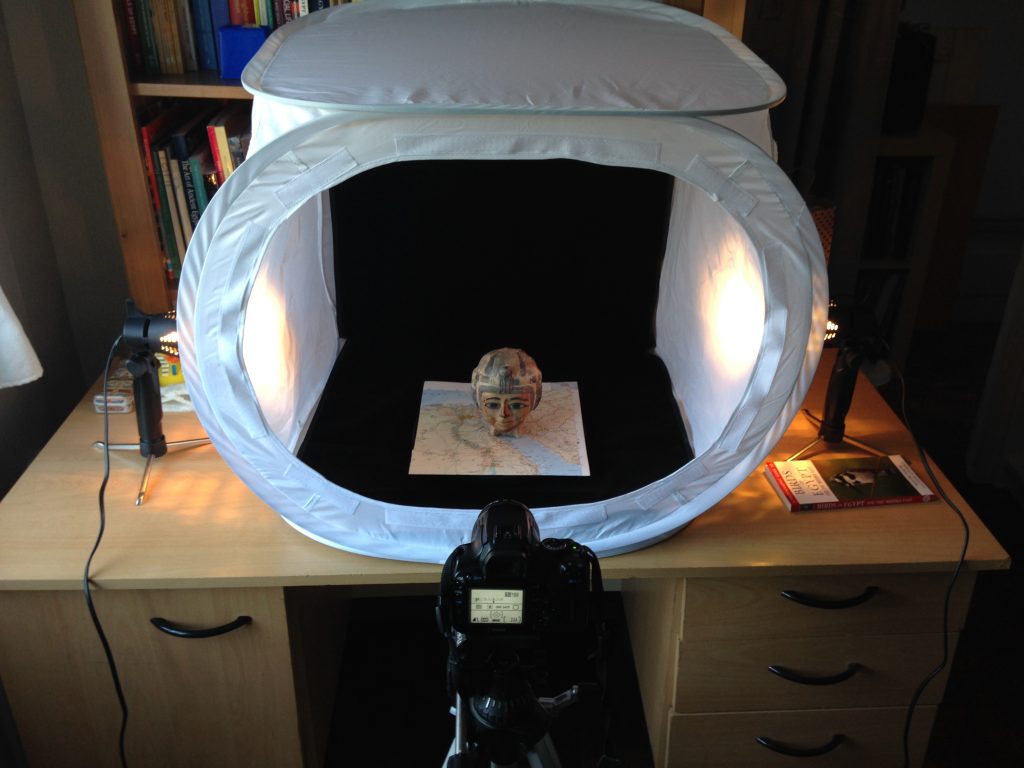
As a set-up I have used a light box tent with a black background, two halogen lamps, a turntable with a map of Egypt pasted on top for extra reference points, a tripod and my old Canon EOS 400D. As a subject, I have used a little souvenir head acquired from the vendors at Deir el-Medina.
Additionally, a ring flash could be used to get flat and even lighting, although this may not be allowed when photographing museum objects. Also, a remote control can come in handy when taking many shots, so the camera doesn’t risk shifting.
For the workshop, I provided a folder of 100 photos of the statue head, 51 with the object on its side and 49 as it stood upright. I have shot these in both RAW and JPEG format, although I here use the JPEG files, at about 2.5 MB each.
In this tutorial I use the Standard Edition of Agisoft Metashape (previously called PhotoScan) bought for 179 USD. A free 30-day trial version can be downloaded of the Professional Edition, with a lot more nifty features and quality checks. But I personally like ‘poor (wo)man’s photogrammetry’ – using relatively simple means to obtain a 3D model.
Regarding hardware: my laptop has an Intel Core i5 processor with 8 GB of RAM and an NVIDIA GeForce GTX 1050 video card. It works reasonably well when processing 100-200 photos, although Agisoft sometimes shuts down out of protest (tip: save your work after each step).
Loading photos
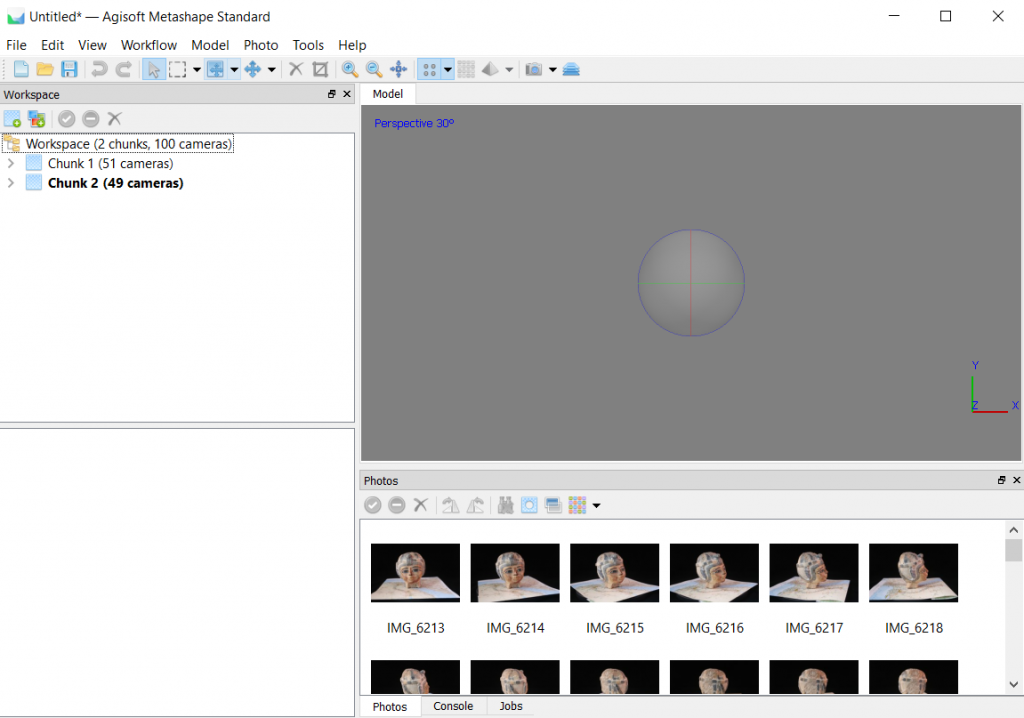
Upon opening Agisoft Metashape, you will see a grey screen that is your 3D viewer, a workspace on the left and a photo viewer at the bottom. To load the images, simply drag and drop the 51 ‘Side’ photos on to the grey screen. They will be added to ‘Chunk 1’ and shown at the bottom.
Right-click in the workspace area and choose ‘Add Chunk’. Drag and drop all the ‘Straight’ photos on to the grey area. Now you should have two chunks: one containing 51 cameras, one with 49 cameras.
Aligning photos
Select the first chunk in the workspace. Choose ‘Workflow > Align Photos’ and a prompt will come up. Choose Accuracy: Highest and make sure ‘Generic preselection’ is checked. The Advanced settings can be left as is.
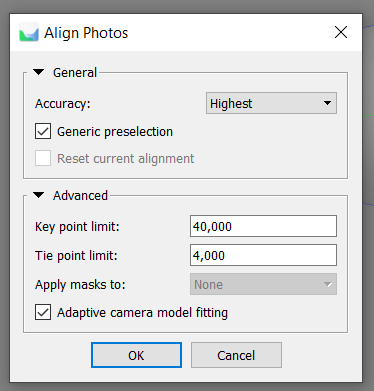
Click OK and the software will start detecting points. This may take a few minutes. It is best to close all other programs while working with Agisoft, because it will use all your available processing power. After detecting 40,000 points per photograph, the software will try to match these points, and if all goes well produce a point cloud.
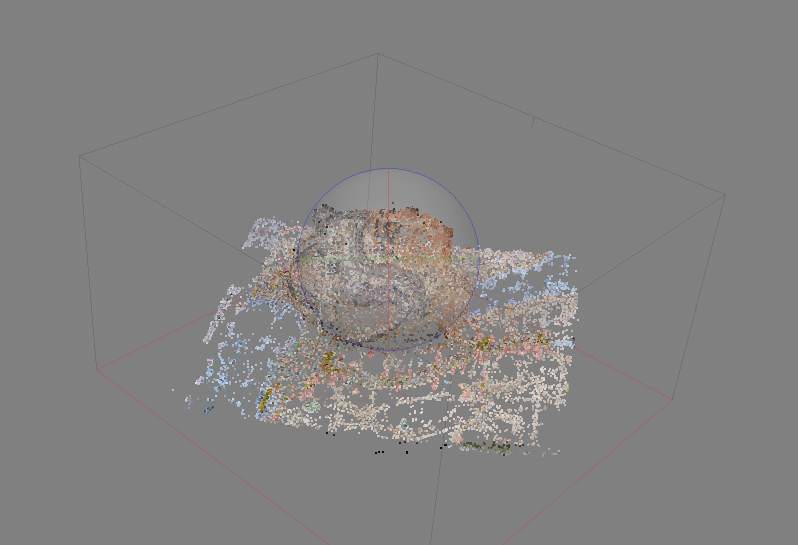
With the mouse’s scroll wheel you can zoom in and out of the point cloud. With the ‘Navigation’ pointer selected in the tool bar, clicking and dragging makes the object rotate. Notice the rotating orb at the center of the 3D viewer. Right-clicking and dragging allows you to move the object in relation to this orb. Play around with these controls until you get the hang of it. When clicking on the ‘Show Cameras’ icon in the tool bar, you will notice a bunch of blue rectangles popping up. These are the calculated camera positions for each of the photos.
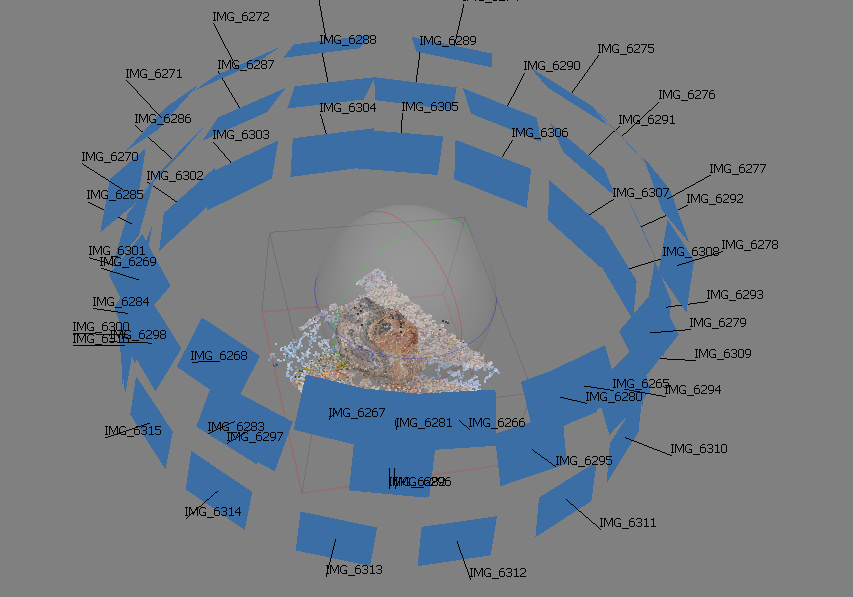
Repeat the ‘Align Photos’ action for the second chunk (first select it in the workspace on the left). Save your work between steps. Now you should have two gorgeous so called sparse point clouds.
Building a dense cloud
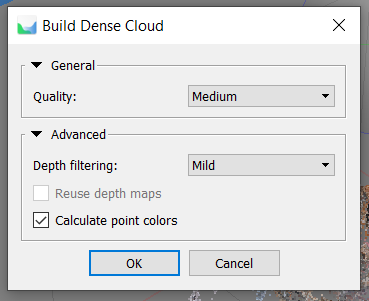
Let’s add some more points. Select one of the chunks and choose ‘Workflow > Build Dense Cloud’. For the purpose of this tutorial, select ‘Quality: Medium’ and ‘Depth filtering: Mild’. Leave ‘Calculate point colors’ checked. This operation will again take a couple of minutes.
Cleaning up the point cloud
To see the calculated dense cloud, first select ‘Dense Cloud’ in the tool bar. You will now have an almost 3D looking model with a bunch of black artefacts floating around. But when you zoom in a lot you will see the object still consist of points.
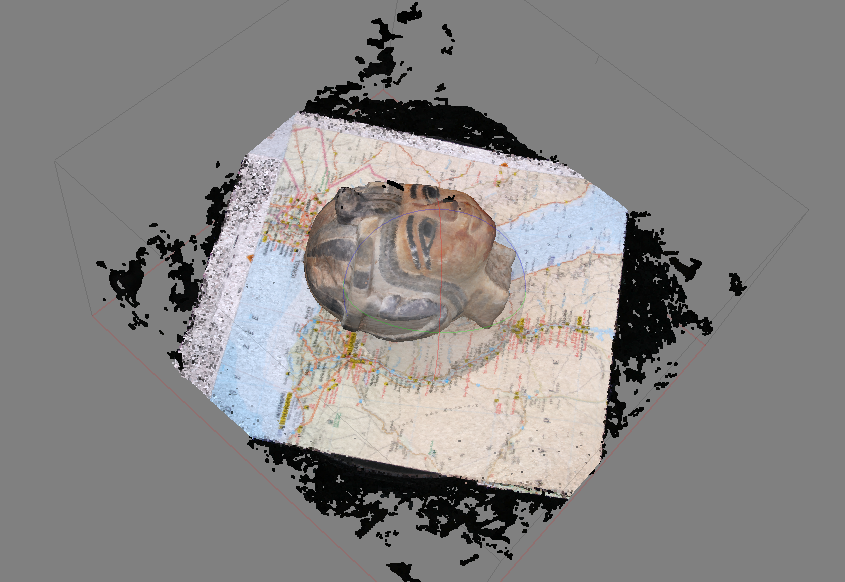
Rotate the object so you see it more or less straight from the top. Click on ‘Rectangular Selection’ in the tool bar and select a portion of the map and black artefacts for removal. Press ‘Delete’. Repeat until a small portion of the map is left.
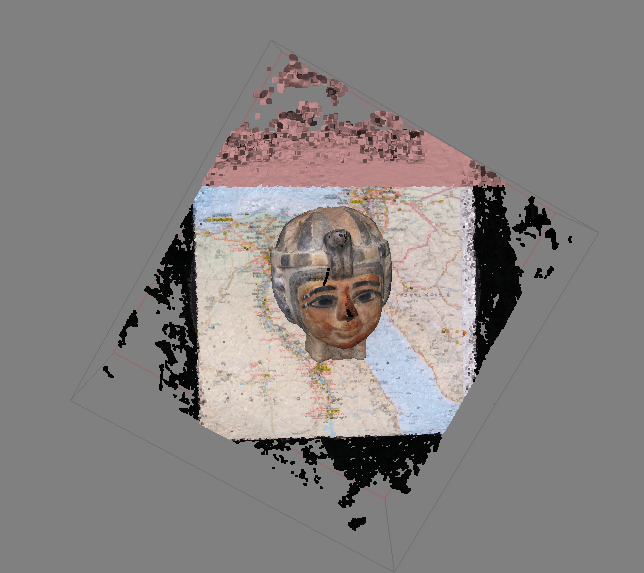
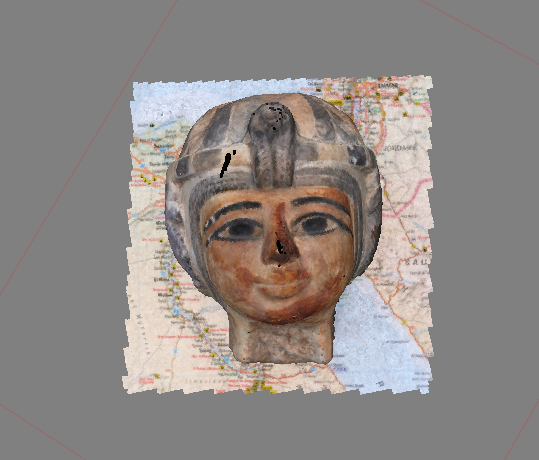
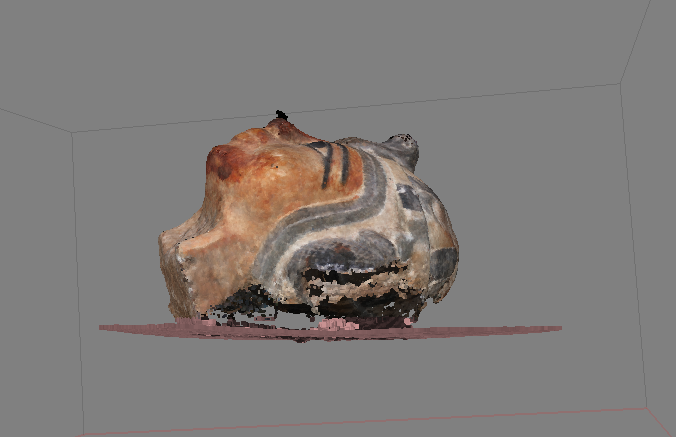
Now rotate the object so you can see it from the side. A black speck is floating in space. Select and delete it. Now very carefully select and delete the map on which the head is positioned. It is OK if part of the poor man’s head goes missing, because we will fix this with our other chunk. With the ‘Free-Form Selection’, try to carefully select and delete the black speck on the little man’s nose as well.
Positioning the bounding box
You will notice a rectangular box around the model, called the bounding box or region. With the ‘Move’, ‘Resize’ and ‘Rotate Region’ tools in the tool bar you can try positioning the object at right angles with the bounding box. Notice that the side with red ribs and the plus sign is the ground level. The complete object should be within the bounding box. It works best to first rotate the model so you are looking straight at it and then rotate and resize the bounding box around it. This requires some patience at first.
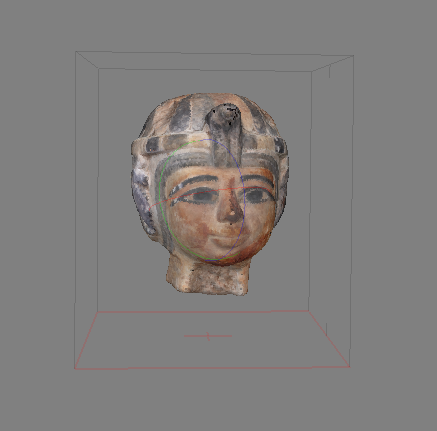
The fun thing is: we can repeat all these steps for the second chunk! So building a dense cloud, cleaning up the point cloud and positioning the bounding box. Put on some music and don’t forget to save your work.
Building a mesh
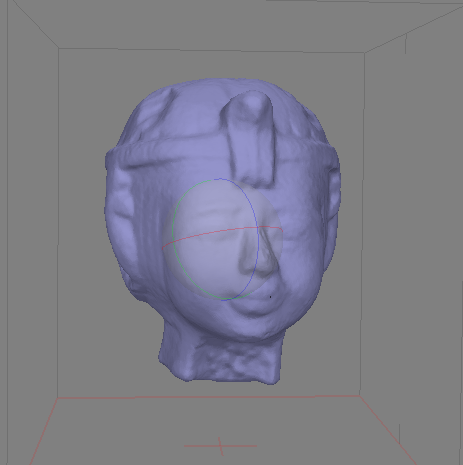
The good thing is that when all of this is done, the next steps will be easy peasy. First, create a mesh for each of the chunks. Go to ‘Workflow > Build Mesh’ and select ‘Source data: Dense cloud’, ‘Surface type: Arbitrary (3D)’ and ‘Face count: High’. Leave the Advanced settings as they are. This won’t take long.
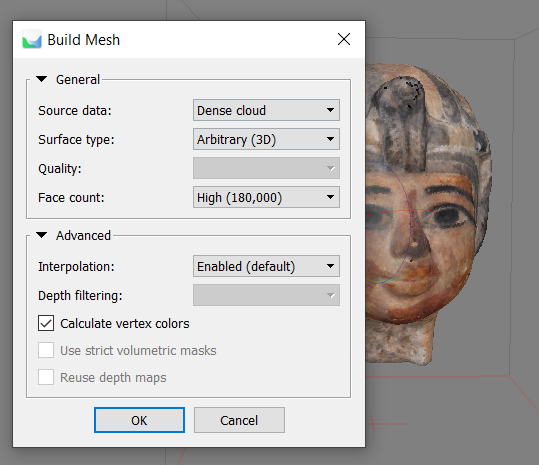
After finishing, select the little pyramid icon in the tool bar and view the Shaded, Solid and Wireframe models to prove that you have built your first 3D object. Repeat the steps of building a mesh for the second chunk.
Adding masks
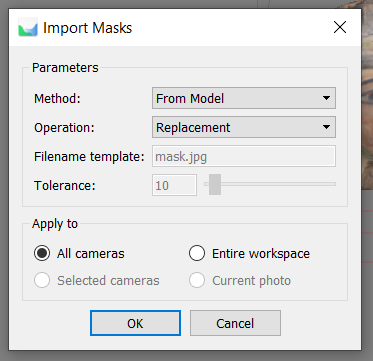
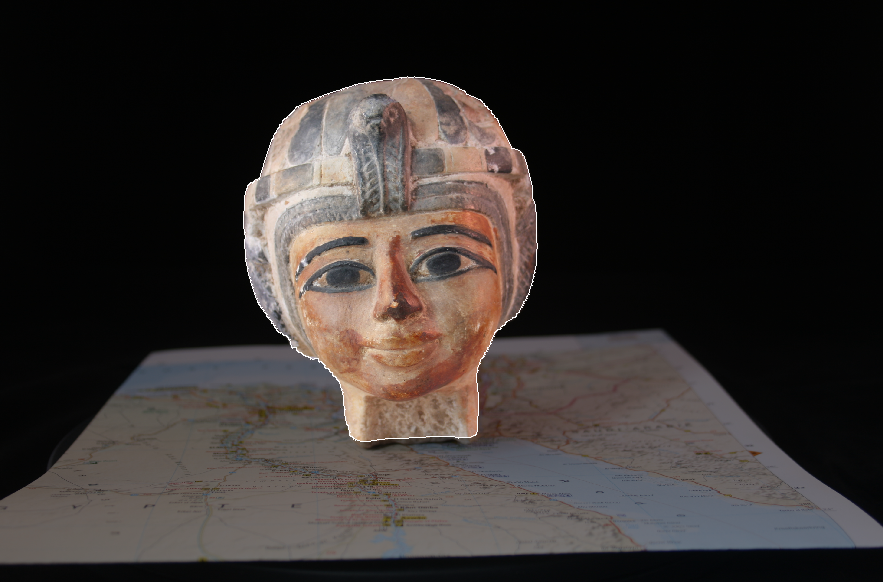
Choose ‘File > Import > Import Masks’. Select ‘Method: From Model’, ‘Operation: Replacement’ and ‘Apply to: All cameras’. This will generate masks for your photos to mask out all but the points you want to use to merge the two chunks into one perfect model. You can view the masked photos by double-clicking on a photo in the photo viewer. Repeat the masking action for the other chunk.
Merging chunks
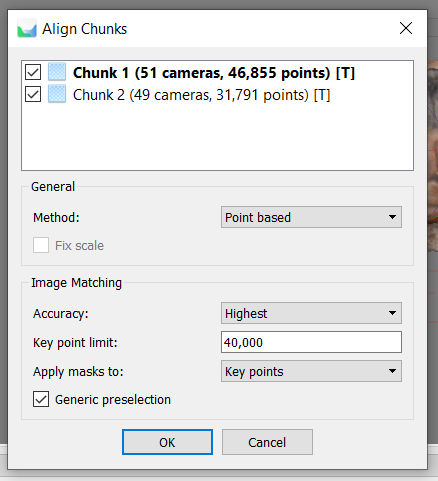
Now comes the final stage. Choose ‘Workflow > Align Chunks’ and make sure both chunks are checked. Select ‘Method: Point based’, ‘Accuracy: Highest’ and ‘Apply masks to: Key points’. Key point limit is set at 40,000 and ‘Generic preselection’ is checked. This operation may take a while.
Check if the chunks are aligned properly by clicking the last icon on the tool bar, ‘Show Aligned Chunks’. When the models overlap, you’re good, if not, you’ll get a monstrosity like this:
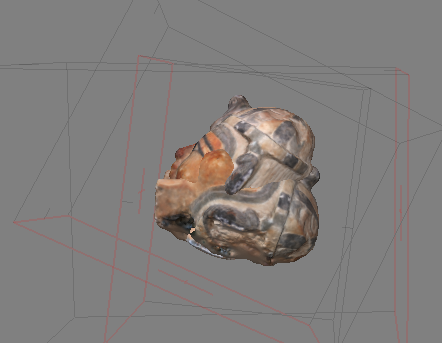
If all looks well and good, choose ‘Workflow > Merge Chunks’. Make sure both chunks are selected, as well as ‘Merge dense clouds’.
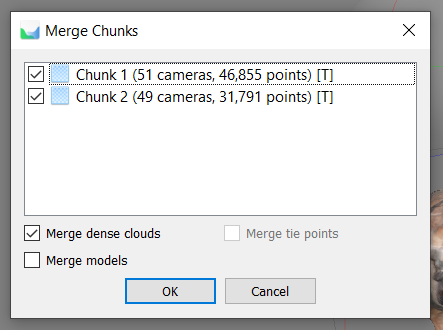
A ‘Merged Chunk’ will appear in the workspace consisting of 100 cameras. Repeat the steps of building a mesh for this dense cloud (‘Workflow > Build Mesh’).
Adding texture
Finally, your mesh needs some texture. Choose ‘Workflow > Build Texture’ with the default settings selected.
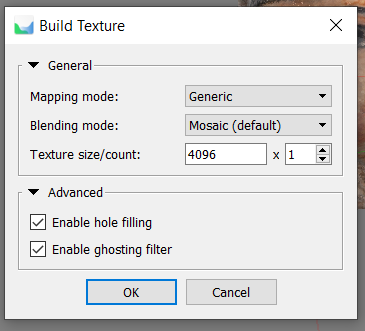
To view the textured model, select ‘Textured’ in the mesh tool on the tool bar (underneath ‘Shaded’, ‘Solid’ and ‘Wireframe’). Isn’t he pretty?
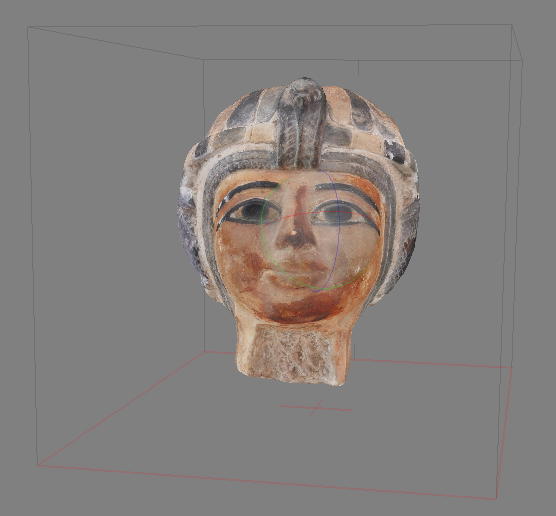
You can now export your model (‘File > Export > Export Model’) and open it in any 3D viewer, use it in 3D software such as Blender, or upload it to Sketchfab.
Happy modeling!